Solar Charging Cable Management for Tradies: Clean Installs That Last Years
When it comes to solar installations, tidy cable work isn’t just about presentation – it’s about performance, safety, and long-term reliability.
Poor handling of solar charging cables can lead to early system failures, hard-to-trace faults, and even non-compliance with industry standards. These issues don’t just impact the system – they cost time, money, and your reputation.
In this guide, we’ll cover practical, trade-level tips to help you deliver neater, safer, and longer-lasting installs. From proper use of clips and conduits to managing bend radius and labelling, here’s how to get your solar power cable working right the first time around.
Why Good Solar Charging Cable Management Matters
Messy wiring might get the job done today, but it’s almost always a problem later. Here’s why managing solar power cables properly should be a top priority on every job:
- Weather and UV exposure quickly degrade unprotected solar charging cables.
- Tight bends and stress points cause premature wear and voltage loss.
- Loose or unsupported solar power cables can pull on terminals, causing faults or safety risks.
- Poor labelling leads to time-consuming fault-finding and service delays.
- Untidy installations reduce client confidence and harm your professional image.
Tidy solar power cable work shows pride in your installation. It reduces callbacks, cuts down rework, and helps systems perform as expected for years to come. Clients might not understand kilowatt-hour calculations, but they can easily spot the difference between a rushed job and a professional one. That impression can make or break repeat business.
Tip 1: Use the Right Clips and Ties for the Right Job
Clips and ties are essential for securing solar charging cables, but not all are built to last – especially in harsh Australian conditions. The right choice depends on the environment, cable type, and exposure. Using the wrong solar cable clips and ties can lead to damaged solar cables, safety issues, or premature failure.
Recommended Practices:
- UV-Rated Cable Clips
Best suited for exposed outdoor runs on rooftops or solar panel frames. Choose AS/NZS-compliant clips specifically rated for high UV exposure and temperature fluctuations. - Stainless Steel Clips with Rubber Saddles
Ideal for long-term durability in hot or coastal areas. These resist corrosion and provide secure support without damaging the solar charging cable sheath. - Multi-Cable Clips
Perfect for bundling multiple PV strings or communication cables neatly along mounting rails or conduits. They help reduce clutter and make maintenance easier. - Use Plastic Cable Ties with Caution
Avoid relying on plastic solar cable ties alone in external environments, as they can degrade in sunlight or damage insulation. Instead, opt for UV-stabilised, releasable ties with saddles or anchors, and always pair them with proper clips – don’t use them as a substitute.
Example:
On a metal roof installation, standard plastic clips or ties may become brittle and snap within a year or two. Opting for UV-stabilised stainless clips with rubber backing offers years of resilience in 40°C+ heat, maintaining both safety and appearance for years to come.
Tip 2: Install Conduits Neatly For Best Cable Functionality
Conduits play a vital role in protecting solar charging cables – not just from the elements, but from mechanical damage, pests, and foot traffic. They also help keep your installs looking sharp and organised. However, installing conduit properly is vital to getting the most out of it.
Installation Best Practices:
- Use heavy-duty corrugated conduit (typically grey or orange) rated for outdoor and rooftop applications.
- Support conduits with metal or UV-rated saddles every 300 to 400mm to prevent sagging or movement over time.
- Avoid sharp bends – use sweeping curves or factory elbows to prevent solar power cable pinching and stress.
- Seal both ends of each conduit run with glands or bushings to keep out insects, moisture, and dust.
Example:
On a cabin install headed for a rural site, leaving solar power cables exposed on the roof might mean rapid UV damage and the risk of snagging during transport. Running them in heavy-duty orange conduit, secured every 300mm and sealed with glands, will ensure long-term protection and a much cleaner finish – ready for the road and the elements.
Tip 3: Respect the Solar Charging Cable Bend Radius
Bend radius is one of the most overlooked details in solar charging cable management, but getting it wrong can lead to serious long-term issues. Every cable has a minimum bend radius, which is usually 4 to 8 times its diameter. Bend it too tightly, and you risk damaging the internal conductors or insulation, even if the problem doesn’t show up right away.
Best Practices:
- Avoid bends tighter than 50mm unless the cable specification sheet allows it.
- Use smooth, sweeping curves instead of sharp 90° corners.
- Don’t force cables into tight junctions or wall entries – compression can cause insulation breakdown.
- When running through roof cavities or tight spaces, guide the cable gently and avoid kinks or pinching.
Example:
A tight loop under a rooftop panel might look tidy, but if a 6mm² solar charging cable is bent past its minimum radius, micro-cracks can form in the insulation. With seasonal expansion and contraction, those cracks can turn into full-blown faults within a year or two, leading to underperformance or even – in the worst cases – system shutdown.
Tip 4: Label Everything Clearly and Correctly
Solar charging cable labelling is critical not just for safety and compliance under AS/NZS 5033 – especially with multiple strings or parallel systems – but for making your future service work faster and less frustrating.
Labelling Recommendations:
- Use UV-stable, weather-resistant labels rated for outdoor solar environments.
- For high-exposure installs, apply printed labels sealed in clear heat shrink for extra protection.
- Mark key details: polarity, string number, system voltage, and array identifiers.
- Don’t forget entry points into switchboards or junction boxes — these should be labelled clearly as well.
- Some installers use standard stick-on labels; these can fade or peel over time. Purpose-built label kits designed to resist heat, UV, and moisture are a more durable option.
Example:
On a hybrid install with four rooftop arrays, clearly labelled solar charging cables at the panel and inverter can greatly simplify troubleshooting a voltage drop. Without those labels, testing and tracing might be time-consuming, which isn’t ideal in an environment where temperatures can reach 35°C on a corrugated roof.
Tip 5: Plan Solar Charging Cable Runs for Clean Layouts
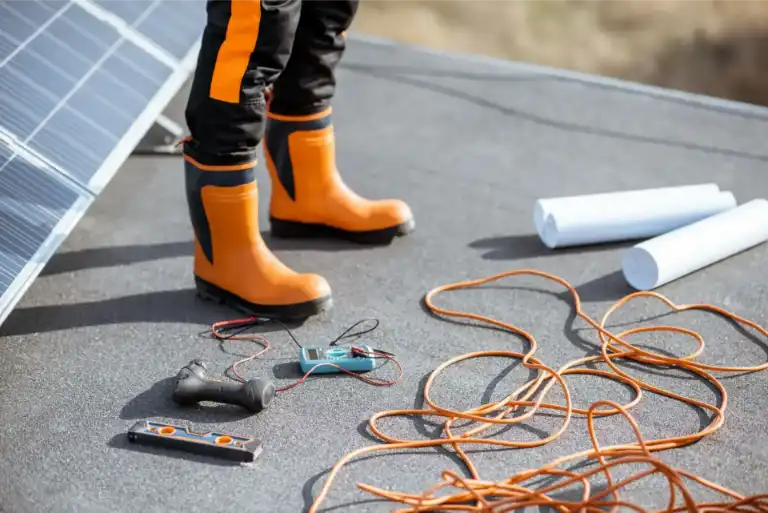
Nothing screams “rushed job” like tangled, messy solar cabling. Taking time to plan your solar charging cable runs before installation helps avoid crossover, clutter, and other safety issues.
Smart Routing Ideas:
- Keep AC and DC runs separate to reduce electrical interference and stay compliant with AS/NZS standards.
- Group solar power cables by function – solar, battery, communications – and secure each bundle independently.
- Use solar cable trays or ducting for large bundles, particularly in battery rooms or switchboard cabinets.
- Route along walls, beams, or structural edges instead of diagonally across open areas.
Example:
On a containerised battery install, pre-planning the layout of conduits and trays before pulling a single solar cable can help avoid a chaotic tangle later. The result? Easier access for commissioning, tidy routing for airflow, and room for future system upgrades without having to undo half the installation.
Complete Quality Cabling Jobs With PV Connections
Good cable management isn’t just about appearances – it’s an investment in system reliability, fewer faults, faster servicing, and a stronger business reputation. If you’re looking for quality clips, conduits, or label kits, PV Connections is Australia’s trusted supplier of premium balance-of-system components. We offer durable cable, protection gear, and custom-label solutions for local conditions. Contact us or check out our range today for signature quality on every job.