
How To Crimp MC4 Solar Connectors
Since their launch in 2004, MC4 connectors have emerged as the standard for safe, simple-to-use and universally compatible connectors in solar installations. They are used wherever secure solar connections are needed in the system — whether that is between individual photovoltaic (PV) modules to form a full solar array, or from the array to the inverter and so on.
Knowing how to properly crimp an MC4 connector to a cable is vital to ensure that the connection is efficient and safe, along with preventing callbacks and inconvenient system downtimes. Improper crimping can lead to hazards such as arcing, overheating, connection failure and even pose a dangerous fire hazard.
To understand what is involved in a proper crimping process, let’s dive first into a brief overview of an MC4 connector’s key components, then explore an easy step-by-step crimping guide.
Key Components of an MC4 Solar Connector
MC4 connectors typically come in male and female pairs, with the male connector having a protruding pin and the female connector having a recessed socket. Both male and female connectors are made from multiple components that work together to form a weather-resistant electrical connection, such as:
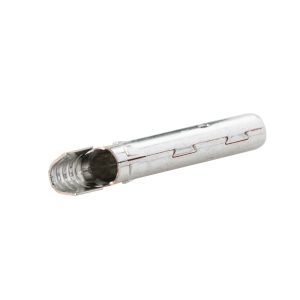
- Housing: A durable plastic shell that protects the metal contact. It is typically made from UV-resistant and flame-retardant materials such as PPO (Polyphenylene Oxide) or PA (Polyamide).
- Crimp Pin (Metal Contact): Made of conductive elements and will be crimped onto the stripped wire. It ensures power transfer between connective cables.
- Seal Rings and Gland Nut: These components work together to create a waterproof and dustproof seal around the cable. The rubber seal ring fits around the cable entry point, pressing against both the cable and the housing. The gland nut tightens down on the seal, further compressing it and securing the cable.
- Locking Clips: Typically made from stainless steel and designed to engage in a snap-lock mechanism, creating a connection resistant to vibration, mechanical tension, or accidental pulls. They secure the male and female connectors together to prevent unintentional disconnection, ensuring a reliable electrical connection.
Step-by-Step MC4 Solar Connector Crimping Guide
Step 1: Prepare your tools
Before you begin crimping MC4 connectors, it is essential to have the proper tools and materials at hand, including:
- MC4 crimping tool (specifically designed for use with MC4 connectors as per manufacturer’s recommendation)
- Wire stripper (adjustable to accommodate the cable size being used)
- MC4 spanner or wrench (while optional, it is highly recommended for proper and secure installation)
Step 2: Remove some insulation
Take the wire stripper and strip just enough insulation — around 6 to 7 mm — so that the exposed copper wiring fits snugly inside the MC4 connector. Make sure not to nick the copper strands; this will reduce their conductivity.
Step 3: Carefully crimp the pin
Take the MC4 pin and insert it into the correct crimper slot. Then, ensure all ends of the copper wire are intact and untwisted before you insert it into the crimp pin. Make sure it reaches the back of the pin.
Apply even pressure using an MC4 crimping tool and secure the contact. Check that the pin does not slip off or migrate.
Step 4: Push pin into housing
Insert the pin into the MC4 connector housing and make sure you hear it click into place, which is a sign that it is secure.
Step 5: Secure the connection
To keep dust and water out, you need to tighten the gland nut with an MC4 spanner or wrench until you hear an audible click or until the nut is snug. Be careful not to over-torque the gland nut; this can lead to issues such as micro-cracks in the connector and compromised sealing.
Step 6: Run some tests
Do not take safety for granted. After assembling the MC4 connectors, it is always essential to test the connection to make sure that everything is safe. Put these steps on your checklist:
- Visually inspect the connectors for any signs of misalignment or loose contacts. The housing should be firmly seated around the metal contact, with no visible gaps.
- Use a multimeter to test the polarity and whether the current can freely flow through the connector. Also, ensure the voltage readings match the array design.
- Perform a pull test on the cables to confirm if the metal contact is securely attached, preventing any accidental disconnection from happening.
Need a play-by-play walkthrough? Watch James take you through all the crimping steps in our video guide:
Common Questions About MC4 Connector Crimping
1. Can I use other tools, like general-purpose crimpers, to crimp MC4 connectors?
It is not recommended to use non-designated MC4 connector crimping tools such as pilers or general-purpose crimpers. They may be able to apply enough pressure for at least a partial crimp, but there is a high chance that the crimp will be messy and unable to withstand harsh outdoor conditions for the long term.
2. What happens if I strip too much of the cable to insert the metal pin?
If you strip too much insulation, the connection will not be tight enough. Conversely, if you strip too little, the connector will not be able to grip the wire securely. In both cases, improper stripping can lead to weak and unreliable connections along with potentially electrical arcing, overheating, and even fires.
3. Why must the copper wires remain untwisted when crimping the pin?
When you twist the copper wires, their diameter increases, which interferes with the crimping process. If the wire doesn’t fit properly in the connector, you run the risk of it coming loose. This increases the chances of a failed connection.
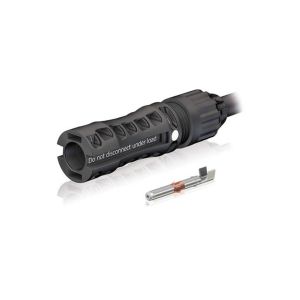
4. Once the crimping is done and the connection is made, is there anything I can use to secure my MC4 connectors in place?
Yes, you can use clips like our MC4 panel clips to secure the MC4 connector to your solar panels, which helps to prevent accidental disconnection and keeps the solar power system running safely and efficiently.
Crimp with Confidence
A solar installation is only as safe and secure as its connections. It is simple enough in theory to properly crimp MC4 connectors to wires, but do not take it for granted. Make sure that you use the correct equipment, follow the steps and guidelines, and always test new connections to make sure they are safe.
Need more help with MC4 connectors or other solar installation components? Contact us and we can see how to support you.
Shop Our Product Range
-
 Crimping Tool MC4Product Code: PV-CC$110
 -
 MC4 Panel Clip – Pack of 100Product Code: PV-MC4PC$67
 -
 MC4 Pin to suit Female Connector – Pack of 100Product Code: PV-BP4/6$133
 -
 MC4 Pin to suit Male Connector – Pack of 100Product Code: PV-SP4/6$133
 -
 Genuine MC4 EVO2 Female Branch SocketProduct Code: PV-AZB4-EVO2$13.10
 -
 Genuine MC4 EVO2 Female Connector 1500VProduct Code: PV-KBT4-EVO 2/6I-UR$2.15
 -
 Genuine MC4 EVO2 Male Branch PlugProduct Code: PV-AZS4-EVO2$13.1
 -
 Genuine MC4 EVO2 Male Connector 1500VProduct Code: PV-KST4-EVO 2/6I-UR$2.15
 -
 Genuine MC4 Female Connector 4-6mm- PositiveProduct Code: PV-KBT4/6I-UR$1.80
 -
 Genuine MC4 Male Connector 4-6mm- NegativeProduct Code: PV-KST4/6I-UR$1.8
 -
 Staubli MC4 1500V 20amp In-line FuseProduct Code: PV-ILF-20$27
 -
Staubli MC4 1500V 25amp In-line FuseProduct Code: PV-ILF-25$27
-
Staubli MC4 1500V 30amp In-line FuseProduct Code: PV-ILF-30$27